In the rhythm of our daily kitchen symphony, the garbage disposal plays a crucial role in keeping things harmonious. However, just like any other appliance, it is not immune to glitches. Understanding the common issues that can plague a garbage disposal is essential for maintaining the smooth cadence of our culinary routines.
Imagine this: you’re in the midst of preparing a delightful meal, and suddenly, your trusty garbage disposal decides to throw a discordant note into the mix. Whether it’s strange noises, foul odors, or a sudden halt in its operation, these issues can disrupt the culinary melody and leave you with a sink full of challenges.
Importance of a Functioning Garbage Disposal
Before delving into the intricacies of troubleshooting, let’s take a moment to appreciate the importance of a well-functioning garbage disposal. This kitchen companion not only aids in waste management but also contributes to environmental sustainability by reducing the volume of organic waste that reaches landfills. A smoothly operating garbage disposal not only enhances kitchen efficiency but also promotes hygiene by preventing the accumulation of food scraps. In the grand orchestra of household appliances, the garbage disposal plays a significant role in maintaining the overall harmony of our daily lives.
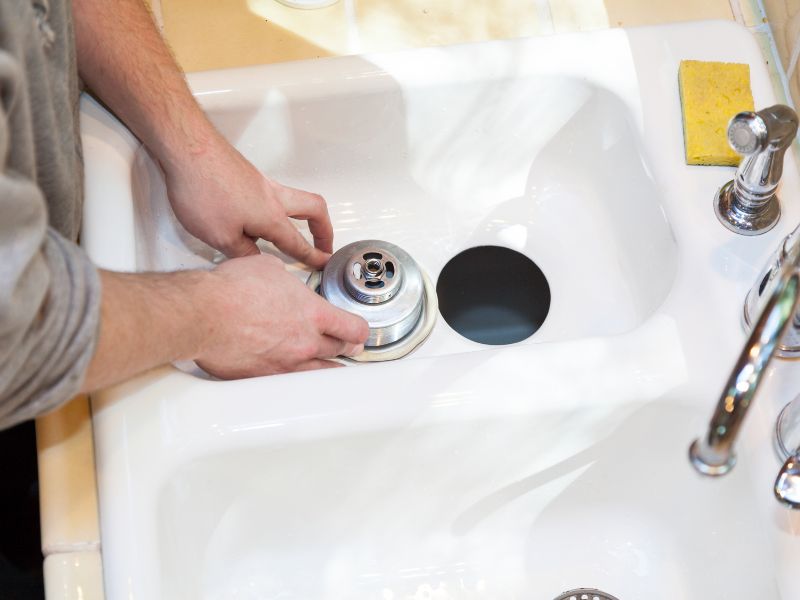
Problem 1: Jammed Mechanism
The unmistakable hum turning into an ominous silence – a jammed garbage disposal can bring your kitchen rhythm to a sudden halt. Signs of a jammed mechanism often manifest as a lack of noise or unusual humming sounds when you attempt to turn it on. The sink may also fill with water, refusing to drain as the jam prevents the disposal from doing its job efficiently.
Step-by-step Solution to Unjam the Mechanism
Rescuing your garbage disposal from the clutches of a jam doesn’t have to be a daunting task. Here’s a user-friendly guide to help you navigate through the process:
- Power Off: Ensure the garbage disposal is switched off before attempting any troubleshooting. Safety first!
- Hex Key Intervention: Many garbage disposals come with a hex key designed for manual operation. Insert the key into the bottom of the disposal and turn it back and forth. This can help dislodge the jam.
- Reset Button: Look for a reset button on the disposal unit. Pressing this can often resolve minor jams by resetting the motor.
- Rotate the Blades: If you don’t have a hex key, use a wooden or plastic tool to rotate the disposal blades manually. This might free up the jammed debris.
- Check for Foreign Objects: Using a flashlight, inspect the disposal chamber for any foreign objects causing the jam. Avoid using your hands; opt for long pliers or tongs.
- Run Water: After attempting the above steps, run cold water to flush out any remaining debris. This not only helps clean the disposal but also ensures that the jam has been successfully cleared.
Problem 2: Lack of Power
The silence that greets you when you flip the switch for your garbage disposal may not always be due to a mechanical issue. A lack of power is a common culprit, and identifying the signs can save you from unnecessary troubleshooting in the wrong direction. Look out for a complete absence of any noise when the disposal is turned on, indicating an electrical hiccup.
Troubleshooting Steps to Restore Power
Restoring power to your garbage disposal involves a bit of detective work and a systematic approach. Here’s a guide to help you troubleshoot and reignite the energy flow:
- Check the Power Source: Ensure that your garbage disposal is securely plugged into a functional power outlet. Sometimes, a simple loose plug or tripped circuit breaker might be the source of the problem.
- Inspect the Reset Button: Like many electrical appliances, garbage disposals are equipped with a reset button. Locate it on the unit and press it to reset the motor. If it clicks, you may have successfully addressed the power issue.
- Examine the Circuit Breaker: Head to your home’s circuit breaker panel and look for any tripped breakers. If you find one associated with the disposal, reset it. A tripped breaker can often be the cause of power failure.
- Test with Other Appliances: Check if the power outlet is functional by plugging in another appliance. If the outlet is dead, the problem is likely with your electrical system and not the disposal.
- Inspect the Power Cord: Examine the power cord for any visible damage. If you notice frayed wires or exposed insulation, it’s time to replace the cord to ensure safe and reliable power.
- Call a Professional Electrician: If all else fails, and you’re not comfortable dealing with electrical issues, it’s advisable to seek the expertise of a professional electrician. They can diagnose and address more complex power-related problems.
Problem 3: Strange Noises
Your garbage disposal should be a silent hero in the kitchen, efficiently grinding away food waste without much fuss. If, however, you’re suddenly serenaded by unsettling clanks, grinds, or screeches, it’s a clear sign that something is amiss. Recognizing these unusual sounds is crucial in diagnosing the issue and restoring your disposal to its harmonious hum
Solutions to Address and Eliminate Strange Noises
Addressing strange noises emanating from your garbage disposal involves a bit of auditory analysis and a strategic approach. Here’s a guide to help you silence the cacophony:
- Identify the Noise: Different sounds can point to various issues. A rattling noise may indicate loose components, while a grinding sound might suggest a foreign object lodged in the disposal. Pinpointing the specific noise can guide your troubleshooting efforts.
- Inspect for Loose Objects: Turn off the disposal and visually inspect the grinding chamber using a flashlight. Loose items like utensils or small debris can cause strange noises. Retrieve any visible objects using tongs or pliers.
- Check for Wear and Tear: Examine the disposal’s blades for signs of wear and tear. Worn-out or damaged blades can create unusual sounds during operation. If necessary, replace the blades following the manufacturer’s guidelines.
- Remove Hard or Large Objects: If the noise resembles a grinding sound, it might be due to hard or large objects in the disposal. Use pliers to carefully remove these items, ensuring the disposal can function smoothly.
- Run Ice Cubes: Grinding ice cubes in the disposal can help dislodge any debris or buildup on the blades, reducing friction and minimizing strange noises. Follow this with cold water to flush out the loosened particles.
- Tighten Loose Mounting Screws: If rattling sounds persist, check and tighten any loose mounting screws on the disposal unit. A secure installation can prevent vibrations that lead to noise.
- Professional Inspection: If the issue persists despite your efforts, it may be time to seek professional assistance. Persistent strange noises could indicate internal mechanical problems that require expert attention.
Problem 4: Leaks
The discovery of water puddles under your sink is a clear signal that your garbage disposal might be dealing with a leak. Identifying the indicators of a leaking disposal is crucial to prevent water damage and maintain a healthy kitchen environment. Look out for dampness around the disposal unit, water stains, or pooling water beneath the sink.
Steps to Identify and Fix the Source of Leaks
Addressing leaks promptly is vital to prevent further damage and potential mold growth. Here’s a step-by-step guide to help you identify and fix the source of leaks:
- Turn Off the Disposal: Ensure the garbage disposal is switched off and unplugged for safety during the inspection and repair process.
- Inspect the Sink Flange: The sink flange is a common area for leaks. Check the seal between the flange and the sink for any visible cracks or deterioration. Tighten the mounting bolts if they are loose.
- Examine the Dishwasher Connection: If your dishwasher is connected to the garbage disposal, inspect the hose and connections for leaks. Tighten any loose connections and replace damaged hoses.
- Inspect the Disposal Unit: Examine the disposal unit itself for cracks, corrosion, or any visible damage. If you find any issues, it might be necessary to replace the disposal unit.
- Check the Drain Pipe Connections: Inspect the connections between the garbage disposal and the drain pipes. Tighten any loose connections and replace damaged or worn-out gaskets.
- Inspect the Reset Button and Power Cord: Occasionally, leaks can be caused by water coming into contact with the electrical components. Check the reset button and power cord for any signs of water damage. Replace the cord if necessary.
- Run Water: With the disposal unit reassembled, run water to check for leaks. Monitor the entire system closely, paying attention to any signs of water escaping.
- Professional Assistance: If you are unable to identify the source of the leak or if it persists despite your efforts, it’s advisable to seek professional assistance. Leaks can sometimes indicate more complex issues that require expert intervention.
Problem 5: Clogs
A sluggish or non-existent drainage system often signals a clogged garbage disposal, turning your kitchen into a potential flood zone. Recognizing the signs of a clog is crucial for preventing further complications. Look out for slow drainage, water pooling in the sink, or unpleasant odors emanating from the disposal.
Techniques for Clearing Clogs Effectively
Unclogging your garbage disposal involves a combination of caution and practical techniques. Here’s a guide to help you effectively clear clogs:
- Power Off: As always, start by turning off the garbage disposal to ensure safety during the troubleshooting process.
- Use a Plunger: Place a sink plunger over the disposal drain and give it a few firm plunges. This can create pressure to dislodge the clog.
- Try the Baking Soda and Vinegar Combo: Pour a cup of baking soda followed by a cup of vinegar down the disposal. Let it sit for about 15 minutes, then flush with hot water. This natural concoction can help break down organic material causing the clog.
- Use a Plumber’s Snake: If the clog persists, a plumber’s snake or auger can be inserted into the disposal to physically break up and remove the obstruction.
- Check the P-Trap: The P-trap beneath the sink can also harbor clogs. Place a bucket underneath, unscrew the P-trap, and clear any debris. Remember to have a towel handy to contain any water that may drain out.
- Ice and Salt Method: Pour a mixture of ice cubes and coarse salt down the disposal, then run cold water. The abrasive action of the ice and salt can help dislodge debris.
- Avoid Harsh Chemicals: While it might be tempting to use chemical drain cleaners, it’s advisable to avoid them, as they can damage the disposal and pipes over time.
- Professional Assistance: If your efforts prove unsuccessful, or if you’re uncomfortable with DIY methods, consider seeking professional assistance. A plumber can assess and address more stubborn clogs effectively.
Problem 6: Resetting the Disposal
Garbage disposals, like any mechanical device, can occasionally experience hiccups that disrupt their normal functioning. Resetting the disposal is a valuable troubleshooting step that can often rectify minor issues, restoring it to optimal performance. This is particularly important when dealing with unresponsive disposals or those that have tripped due to overload.
Step-by-step Guide to Resetting the Garbage Disposal
- Locate the Reset Button: Most garbage disposals come equipped with a reset button. This button is typically located on the bottom of the unit, often near the power cord.
- Turn Off the Disposal: Ensure the disposal is switched off before attempting to reset it. This ensures your safety during the process.
- Press the Reset Button: Gently press the reset button. If you feel a click, you have successfully reset the disposal.
- Wait a Moment: Allow a few moments for the motor to reset and recalibrate. During this time, avoid attempting to use the disposal.
- Switch On the Disposal: After the brief waiting period, switch on the garbage disposal to see if it resumes normal operation. If all goes well, you’ve successfully addressed the issue.
- Monitor for Repeated Issues: Keep an eye on the disposal’s performance to ensure that the reset has resolved the problem. If issues persist, it may indicate a more complex underlying problem that requires further investigation.
Inclusion, In the heart of every kitchen, the garbage disposal quietly plays its role, ensuring a seamless culinary experience. Through our exploration of common problems – from jams and power issues to strange noises, leaks, clogs, and the importance of resetting – we’ve unraveled the tapestry of potential disruptions.
As we navigate the challenges, one theme emerges – the significance of regular maintenance. Simple yet crucial practices, such as mindful use, periodic checks, and proactive care, can transform potential issues into mere hiccups.
So, let’s embrace the art of maintenance, turning our kitchens into havens of efficiency. With a well-cared-for garbage disposal, the rhythm of daily life remains uninterrupted, and the kitchen continues to be a space of joy and creativity. Here’s to a harmonious and smoothly operating culinary haven. Happy disposing!

